Remember that time you spent hours on your hair, only for it to frizz, deflate, or just refuse to cooperate by lunchtime? Ugh, we’ve all been there. What if I told you there’s a hairstyle that laughs in the face of humidity, gives you weeks of stunning looks, and protects your natural hair underneath? Enter the glorious world of Cuban twists – your potential ticket to low-maintenance, high-impact hair.
Seriously, my friend Sarah was skeptical too. After years of battling her gorgeous thick curls daily, she tried Cuban twists on a whim. Two weeks later? She was texting me non-stop: “Zero styling time! My hair feels amazing! Why didn’t I do this sooner?!” Intrigued? Let’s unravel the magic.
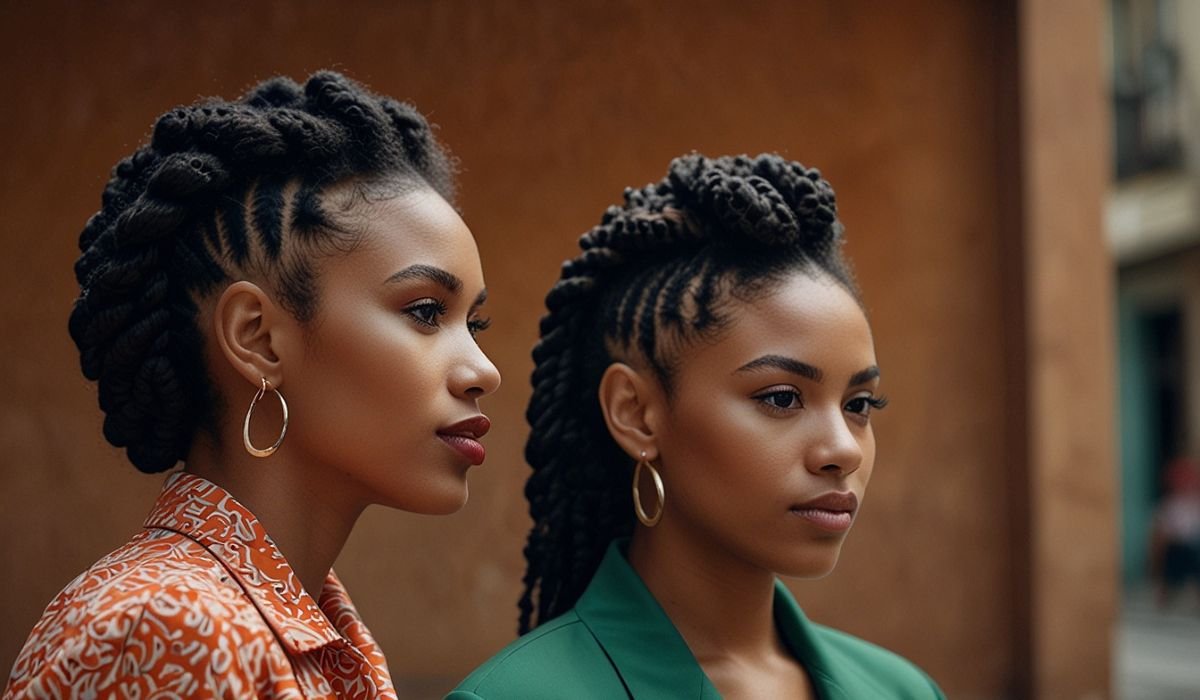
What Exactly Are Cuban Twists? (Understanding the Style)
Think of Cuban twists as the chic, slightly more defined cousin of traditional two-strand twists. They’re a protective hairstyle primarily using synthetic hair (like kanekalon or Marley hair) twisted with sections of your natural hair. The key difference lies in the technique:
- The Base: Your hair is neatly parted (cornrows, individual sections, or a loose base).
- The Twist: Instead of just twisting two strands of your own hair together, you add synthetic hair. One strand is your natural hair + synthetic hair, the other strand is just synthetic hair.
- The Technique: You twist these two strands together tightly and smoothly, creating a sleek, rope-like effect with incredible definition and longevity. The synthetic hair provides length, volume, and that signature polished look.
Why Choose Cuban Twists? (The Awesome Benefits!)
- Protection Powerhouse: Your natural hair is tucked away, shielded from daily manipulation, heat, and environmental damage. Perfect for giving your hair a much-needed break!
- Serious Longevity: Properly installed and cared for, Cuban twists can last 4-8 weeks. That’s weeks of fabulous hair!
- Low Maintenance Queen: Once installed, your daily routine shrinks dramatically. A little moisturizing spray, maybe a satin scarf at night? Done.
- Style Versatility: Updos, ponytails, half-up styles, buns – Cuban twists hold their shape beautifully for endless looks.
- Volume & Length on Demand: Instantly transform your look with dramatic length and lush volume, regardless of your natural hair length or density.
- Frizz Fighter: The smooth, tight twist pattern is incredibly resistant to humidity-induced frizz.
Gearing Up: What You Need for Perfect Cuban Twists
Before the twisting begins, gather your arsenal:
- Synthetic Hair: Kanekalon is the classic choice (lightweight, soft, lots of color options). Marley hair gives a thicker, coarser, more textured look. X-Pression hair is another popular, softer option. (Pro Tip: Match the hair texture to your desired look!)
- Your Natural Hair: Clean, detangled, and preferably stretched (blow-dried or stretched braids) for easier installation and smoother results.
- Leave-In Conditioner/Moisturizer: To keep your natural hair hydrated under the twists.
- Twisting Gel or Wax (Optional): Helps with grip and sleekness, especially around the edges. Use sparingly!
- Rat-Tail Comb: For precise parting.
- Hair Clips: To section hair.
- Sharp Scissors: For trimming the synthetic hair.
- Rubber Bands (Small, Clear): For securing ends (optional, some prefer sealing).
- Lighter or Hot Water: For sealing the ends of the synthetic hair (prevents unraveling). Use extreme caution with lighters!
- Edge Control (Optional): For laying down baby hairs.
| Material | Purpose | Key Considerations |
| Kanekalon Hair | Most common, lightweight, soft feel | Huge color range, easy to work with, affordable |
| Marley Hair | Thicker, coarser texture, more volume | Creates a fuller, more textured look, heavier |
| X-Pression Hair | Soft, pre-stretched, easy to detangle | Convenient, less frizz-prone, good for beginners |
| Twisting Gel/Wax | Adds grip & sleekness | Use sparingly to avoid buildup; opt for water-based gels |
| Sealing Method | Prevents ends from unraveling | Hot water (safer) vs. lighter (caution needed) |
Your Step-by-Step Guide to Installing Cuban Twists (Practical Tips)
Ready to twist? Let’s break it down. (Remember, practice makes perfect!):
- Prep is Key: Wash, condition, and thoroughly detangle your natural hair. Apply your favorite leave-in conditioner or moisturizer. Blow-dry or stretch your hair (braid it while damp) for the smoothest base. Dry hair is essential for grip!
- Part with Precision: Section your hair using your rat-tail comb. You can do all-over individual parts, cornrow the base for a flatter look, or do larger sections for bigger twists. Secure sections not being worked on with clips. Clean parts = a polished finish.
- Measure & Cut Synthetic Hair: Cut your synthetic hair into lengths about double your desired finished twist length. (You’ll fold it in half). Need 18-inch twists? Cut strands about 36 inches long.
- Fold & Anchor: Take one piece of synthetic hair and fold it exactly in half. Slide the folded loop under the base of your natural hair section, right at the root. Pull the loose ends of the synthetic hair through the loop, creating a secure anchor around your natural hair. Pull tight!
- Split & Conquer: You now have two strands hanging down: Strand A (your natural hair + half the synthetic hair) and Strand B (just the other half of the synthetic hair).
- The Cuban Twist Motion: This is the magic!
- Hold Strand A (hair + synthetic) taut with one hand.
- Take Strand B (pure synthetic) and wrap it around Strand A in one complete circle, moving away from your head.
- Now, take the new Strand A (which might now include the wrapped synthetic), hold it taut.
- Take the new Strand B and wrap it around this strand in one complete circle, again moving away from your head.
- Keep alternating: Wrap B around A, then the resulting strand becomes the new A, wrap the other strand (now B) around it. Always wrap away from your head. The key is tight, consistent tension.
- Twist All the Way Down: Continue this wrapping motion tightly and smoothly down the entire length of the hair. Keep the tension even!
- Secure the End: Once you reach the end, you have options:
- Rubber Band: Twist the very end tightly and secure with a small, clear rubber band.
- Seal: Dip the very end (about 1/2 inch) into hot water for a few seconds OR very carefully pass it quickly through a lighter flame to melt the synthetic fibers together. BE EXTREMELY CAREFUL WITH FIRE. HOT WATER IS SAFER.
- Repeat & Conquer: Work methodically section by section until your whole head is transformed!
Q: This sounds tricky! Can beginners really do it?
A: Absolutely! Start with larger sections (they’re faster and more forgiving) and practice the wrapping motion on a small section first. Watch a few video tutorials – seeing it helps immensely! Be patient with yourself.
Loving Your Twists: Maintenance & Styling Secrets
Installation is done – now how to keep them looking fly for weeks?
- Moisturize Your Scalp & Hair: Don’t neglect your hair underneath! Use a lightweight oil (like jojoba or grapeseed) on your scalp and a water-based moisturizing spray (water + leave-in conditioner in a spray bottle) along the length of your twists, focusing on the roots where your hair is exposed. Do this 1-2 times per week.
- Nighttime TLC: ALWAYS sleep on a satin or silk pillowcase or wear a satin/silk bonnet or scarf. This prevents friction, frizz, and keeps your twists neat.
- Cleaning: If your scalp feels itchy or buildup occurs, dilute shampoo in water and gently massage your scalp only. Rinse thoroughly. You can also use a dry shampoo between washes. Avoid soaking the entire length of the twists frequently.
- Frizz Control: A tiny bit of edge control on baby hairs or a light oil rubbed between your palms and smoothed lightly over the twists can tame minor flyaways. Avoid heavy products!
- Styling Galore! The fun part:
- Ponytails (High, Low, Side): Classic and chic.
- Buns (Top Knot, Low Bun): Effortlessly elegant.
- Half-Up, Half-Down: Best of both worlds.
- Accessorize: Headbands, scarves, cuffs, or beads add instant personality.
- Updos: Get creative with braided crowns or intricate pinned styles.
The Future of Your Twists & When to Take Them Down
Enjoy your style! As weeks pass, you might notice:
- New Growth: Your natural hair growing out at the roots – this is normal!
- Loosening: Twists might start to feel less tight, especially near the roots.
- Frizz: Some increased frizz, particularly if you’re active or it’s humid.
Time to Remove? Listen to your hair and scalp. Generally, 4-8 weeks is the sweet spot. Signs it’s time:
- Significant itching or discomfort
- Noticeable buildup that washing doesn’t fix
- Excessive frizz or unraveling
- Your natural hair feels dry or tangled underneath
- You just feel ready for a change!
Removal Tip: Be GENTLE! Carefully snip the sealed end or rubber band off each twist. Then, slowly unravel the synthetic hair from your natural hair. Detangle your natural hair thoroughly with conditioner, then give it a good deep conditioning treatment.
Wrap It Up & Get Twisting! (Conclusion & Action)
So, there you have it! Cuban twists aren’t just a hairstyle; they’re a game-changer for anyone craving stunning, protective, low-fuss hair. They offer versatility, longevity, and a serious confidence boost. Remember Sarah? She’s on her third set now!
Your 3 Actionable Steps to Fabulous Twists:
- Gather Your Gear: Pick your synthetic hair (Kanekalon is great to start!), grab your leave-in, comb, clips, and sealing supplies.
- Prep Like a Pro: Wash, condition, detangle, and stretch your natural hair. Clean, dry hair is essential.
- Start Small & Be Patient: Practice the twisting technique on one section. Don’t rush! Watch a tutorial if needed. Embrace the learning process.
Ready to ditch the daily hair struggle and embrace weeks of effortless style? Give Cuban twists a whirl! I’d love to hear about your experience. Have you tried them before? What’s your biggest hesitation? Share your thoughts or questions below!
FAQs
- Q: How long do Cuban twists take to install?
A: It varies greatly! For a full head with small/medium twists, budget 4-8 hours if doing it yourself for the first time. Speed increases with practice. A stylist might take 3-6 hours. - Q: Do Cuban twists damage your hair?
A: When installed correctly (not too tight at the roots), maintained well (keeping hair moisturized), and removed gently, Cuban twists are a protective style and should not cause damage. Avoid overly tight installations. - Q: Can I get Cuban twists if I have fine or thin hair?
A: Yes! Opt for smaller sections of synthetic hair (like Kanekalon) and potentially larger part sizes to avoid weighing down your hair too much. A skilled stylist can adapt the technique. - Q: How much hair do I need to buy?
A: It depends on your head size, desired thickness, and twist size. Generally:- Small twists: 7-9 packs
- Medium twists: 5-7 packs
- Large twists: 3-5 packs
When in doubt, buy an extra pack!
- Q: Can I wash Cuban twists?
A: Yes, focus on cleansing your scalp. Dilute shampoo in water, massage scalp gently, rinse thoroughly. Avoid excessive soaking/rubbing of the twists themselves to prevent frizz. Use dry shampoo between washes. - Q: What’s the difference between Cuban twists and Senegalese twists?
A: The main difference is the wrapping technique. Senegalese twists involve wrapping two strands around each other simultaneously. Cuban twists involve wrapping one strand around the other sequentially, creating a slightly different, often smoother, rope-like appearance. - Q: How do I make my Cuban twists last longer?
A: Sleep on satin/silk, moisturize your scalp regularly, avoid heavy products, don’t over-manipulate them, and protect them in harsh weather (like under a hat in rain). Gentle handling is key!
You may also like: Step Into Comfort: Discover Why Xuebaotou.com is Winning Chinese Feet Over